

I had a few requests to do a how-to post on the lattice nails I wore in a recent outfit post. I hesitated to show this because it reveals just how imperfect my design actually is. Oops! Oh well. Here you have it, a step by step tutorial for lattice print nails!
Step 1: The Tools
You will need two contrasting polish colors and a top coat.
I used OPI San Tan Tonio and OPI for Sephora Sue vs. Shue for the colors and Seche Vite as the top coat.
You will also need a very thin paintbrush for painting the lines. I used an old paintbrush and cut most of the bristles off so that it was thin enough. You can also use a nail art pen to paint the lines if you wish.
Step 2: The Base
Grab the bottle you wish to use as the base. Paint a coat and let it dry completely before moving to the next step.
Step 3: The Design
I recommend practicing this step on something else to get used to the motion. If you get all the troubleshooting out of the way first, your actual mani will turn out much better. I've also found that painting straighter lines is easier if you hold the paintbrush against your nail and slowly turn your finger to paint the line.
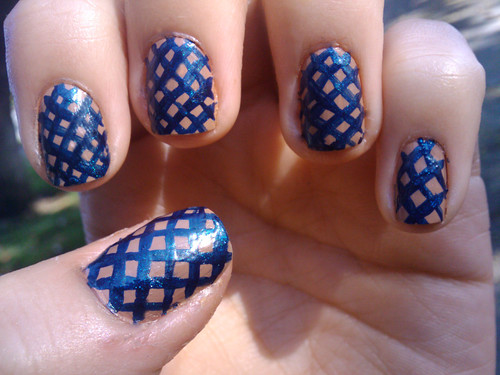
Dip the paintbrush into the second polish and carefully paint lines in the direction and order depicted in the photo below.

Next, finish the pattern by painting lines that follow the arrows in the photo below.

Repeat on each nail until you are finished.
Step 4: The Top Coat
Once the stripes are dry, finish up your manicure with your favorite top coat!
Voilà! You've just finished your very own lattice mani! Send me your finished product and I'll feature your version on my blog!


