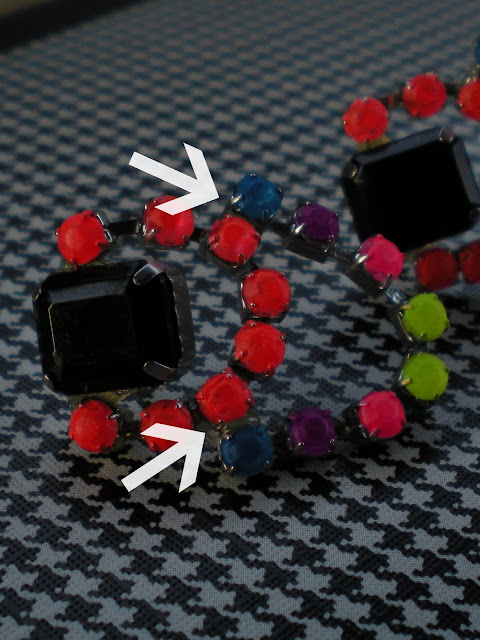
A few hours later, I had done it!
Want to make your own? I'll tell you how I did it! Feel free to change up the "recipe" to suit your own style.
Collect Your Materials
You will need the following for this project:
- Rhinestone chain - I recommend buying silver/clear so you don't have to worry about color showing through the paint. Also, make sure the chain is long enough--I used 32 links.
- Assorted rhinestones - You can choose your preferred shape and colors
- Acrylic paint in colors of your choice - I used five different neon colors
- A paint brush - If possible, use a brush that is about the same size as the rhinestones
- A pair of earring posts and backs or clips - The pair this DIY is inspired by are actually clip-ons so you could easily go that route if you wanted.
- Glue - I ended up using two kinds, super and hot
- Metal snips
Now Get DIYing!
#1 Use the metal snips to cut four 8-link pieces.
#2 Use your paintbrush to paint the tops of each rhinestone. Allow the paint to dry according the the directions on the paint.
#3 While the paint is drying, you can use the super glue to attach your posts to the main rhinestone. Allow glue to dry before handling.
#4 Once everything is dry, you can start to assemble your pieces. Use a small dot of hot glue to attach the ends of one rhinestone chain to each side of your main rhinestone at the points shown below.
#5 Take the remaining chain and secure the ends to the 3 link down on each side, as shown below.
#6 When the glue is dry, you're good to go. Now add your new earrings to any outfit that needs a pop of spring color and go out to show off your handiwork! Congrats, you are one crafty lady who just saved about $180! Go you!
I really hope you'll try this out because there are a lot of ways to make this DIY project completely yours! If you try it, show me and I'll mention you in a future post.
Happy DIYing!


